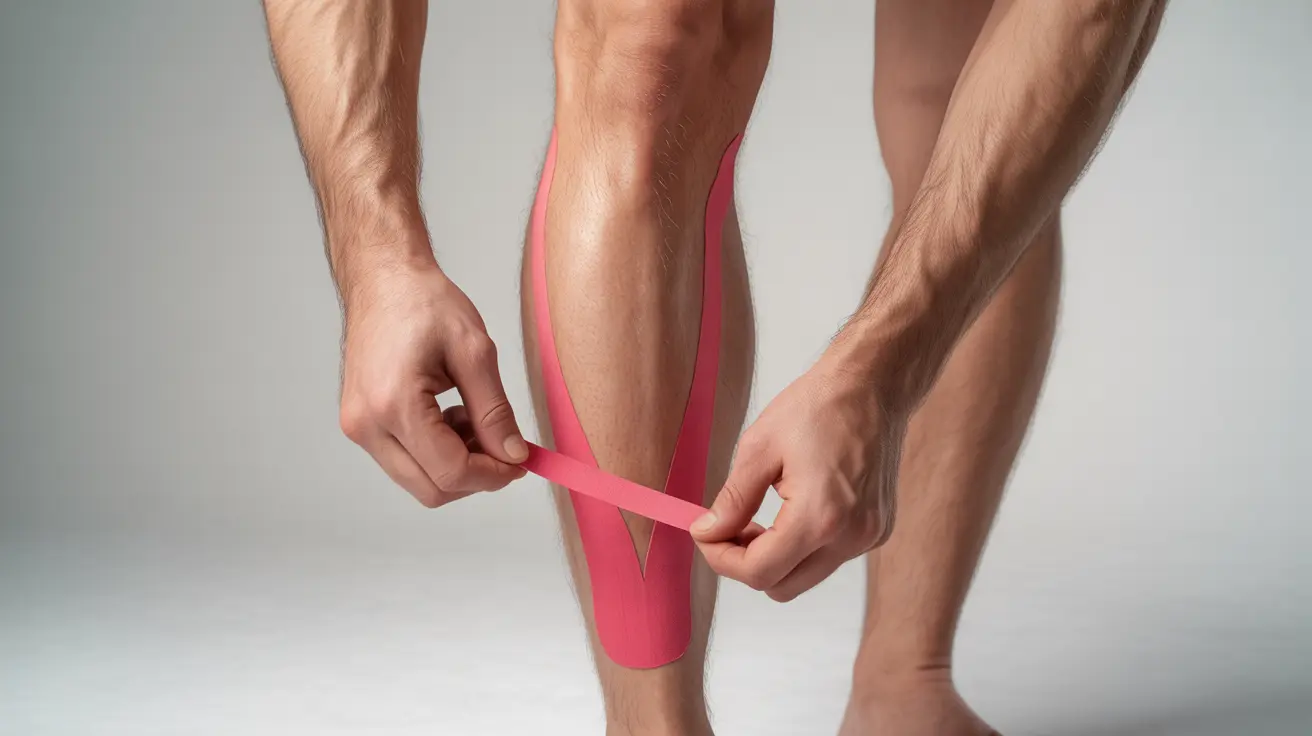
Shin splints can be a frustrating and painful condition for athletes and fitness enthusiasts. Proper taping techniques can provide significant relief and support during the healing process. This comprehensive guide will walk you through the essential steps and methods for effectively taping shin splints, helping you manage pain and maintain your active lifestyle.
Understanding the correct taping approach is crucial, as improper application can reduce effectiveness and potentially worsen discomfort. Whether you're dealing with anterior or posterior shin splints, we'll cover everything you need to know about proper taping techniques and materials.
Essential Materials for Taping Shin Splints
Before beginning the taping process, gather these necessary supplies:
- Athletic or kinesiology tape
- Scissors
- Pre-wrap or underwrap
- Skin cleaner or alcohol wipes
- Adhesive spray (optional)
Preparing for Taping Application
Proper preparation is essential for effective tape application and adherence:
- Clean and dry the shin area thoroughly
- Remove any lotions or oils from the skin
- Trim excess hair if necessary
- Apply pre-wrap to sensitive skin areas
- Ensure the ankle is in a neutral position
Taping Techniques for Different Types of Shin Splints
Anterior Shin Splint Taping Method
For pain along the front of the shin bone, follow these steps:
- Apply anchor strips above the ankle and below the knee
- Create vertical strips along the painful area
- Apply horizontal strips for compression
- Finish with closing strips for security
Posterior Shin Splint Taping Method
When dealing with pain behind the shin bone:
- Start with anchor strips
- Apply supportive strips in a figure-8 pattern
- Add compression strips around the calf
- Secure with closing strips
Best Practices for Optimal Results
To ensure the most effective taping application:
- Apply tape before activity, not after
- Avoid wrapping too tightly
- Check circulation regularly
- Replace tape daily or when it loosens
- Remove immediately if numbness or tingling occurs
Frequently Asked Questions
How do you properly tape shin splints to reduce pain and support healing?
To properly tape shin splints, clean the area first, apply pre-wrap if needed, and use either athletic or kinesiology tape in a specific pattern depending on the type of shin splints. Start with anchor strips, then add support strips in either vertical or figure-8 patterns, followed by compression strips.
What type of tape is best for taping shin splints, and what materials are needed?
Both athletic tape and kinesiology tape can be effective for shin splints. Athletic tape provides more rigid support, while kinesiology tape offers flexibility and promotes circulation. You'll also need pre-wrap, scissors, and skin cleaner for proper application.
Can taping help prevent shin splints from getting worse during physical activity?
Yes, proper taping can help prevent shin splints from worsening by providing compression and support to the affected muscles and tissues. However, it should be used alongside appropriate rest, proper footwear, and gradual return to activity.
What are the step-by-step techniques for taping anterior versus posterior shin splints?
Anterior shin splints require vertical straps along the front of the shin with horizontal compression strips. Posterior shin splints need figure-8 patterns around the calf with additional compression. Both methods start with anchor strips and end with closing strips for security.
Are there any precautions or common mistakes to avoid when taping for shin splints?
Common mistakes include applying tape too tightly, not cleaning the skin properly, and failing to check circulation. Always remove tape if you experience numbness, tingling, or increased pain. Don't apply tape to broken or irritated skin, and replace it when it loses adherence.