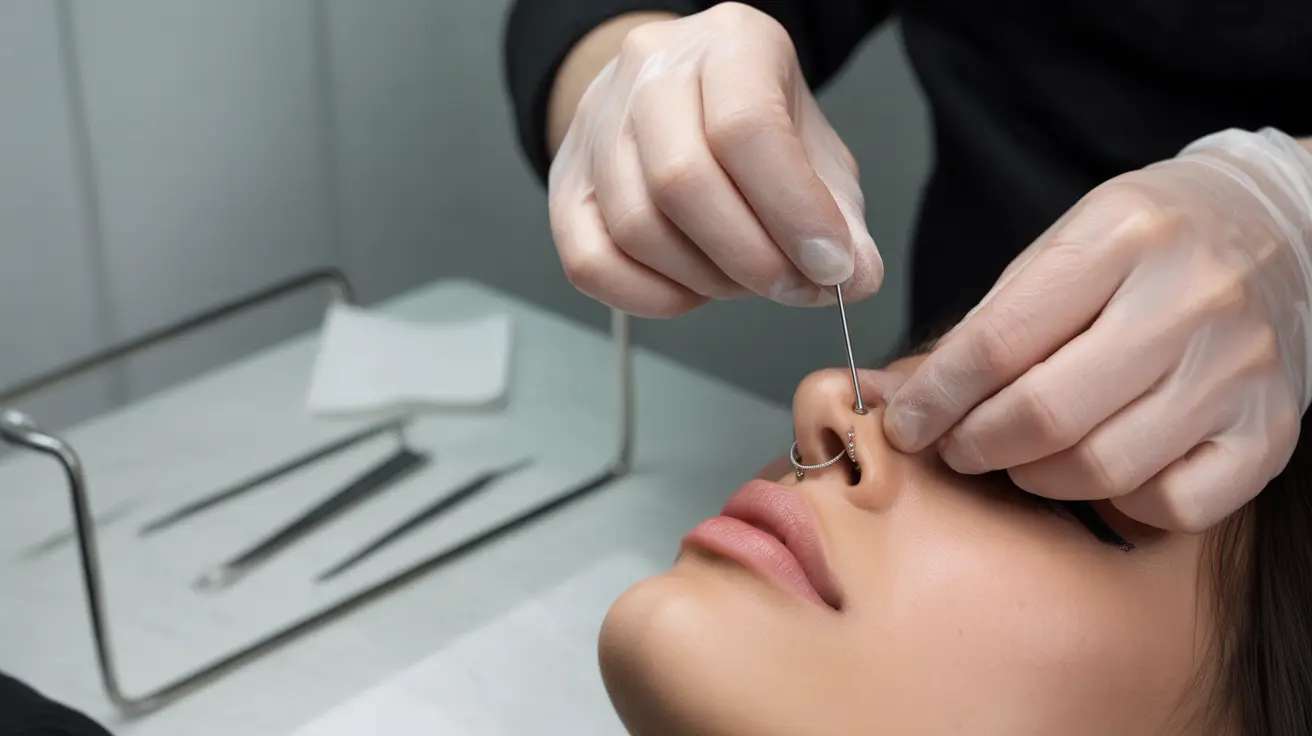
Whether you're changing your nose jewelry for the first time or are a seasoned piercing enthusiast, knowing how to put in a nose ring properly is crucial for your comfort and safety. This comprehensive guide will walk you through the essential steps, precautions, and techniques for inserting different types of nose rings while maintaining proper hygiene and preventing complications.
Preparing for Nose Ring Insertion
Before attempting to insert your nose ring, proper preparation is essential to prevent infection and ensure a smooth process. Always start with thoroughly cleaned hands and sanitized jewelry to maintain a sterile environment.
Cleaning and Sterilization
Start by washing your hands with antibacterial soap and warm water for at least 20 seconds. Prepare your new jewelry by soaking it in a saline solution or rubbing alcohol for several minutes to eliminate any bacteria. Gently pat your nose area with a clean paper towel to ensure it's completely dry before proceeding.
Different Types of Nose Rings and Their Insertion Methods
Nose Studs
Nose studs are among the most common types of nose jewelry. To insert a nose stud:
- Locate the piercing hole from the outside of your nose
- Gently insert the straight end through the hole at a slight upward angle
- Guide the jewelry through until you feel the backing catch inside your nostril
- Adjust the stud so it sits comfortably against your nose
Seamless Hoops
Seamless hoops require careful handling to avoid damaging your piercing. Follow these steps:
- Carefully twist the hoop apart at the seam
- Insert the thinner end through your piercing
- Slowly rotate the ring through the hole
- Gently twist the ends back together, ensuring they align perfectly
L-Shaped and Corkscrew Studs
These styles require specific insertion techniques:
- For L-shaped studs: Insert the straight portion and gently guide the bent end into your nostril
- For corkscrew studs: Insert the straight end first, then carefully twist the spiral portion following its natural curve
Important Safety Considerations
Taking proper precautions during nose ring insertion is crucial for preventing complications and ensuring a comfortable experience. Always ensure your piercing is fully healed before changing jewelry, and never force a piece of jewelry if you encounter resistance.
Signs of a Properly Healed Piercing
Before attempting to change your nose ring, verify that your piercing is fully healed by checking for these signs:
- No redness or swelling around the piercing site
- No discharge or crusting
- No pain or tenderness when touched
- Complete healing typically takes 4-6 months
Frequently Asked Questions
How do you properly clean and prepare your nose and jewelry before inserting a new nose ring?
Clean your hands thoroughly with antibacterial soap, then sterilize your jewelry using saline solution or rubbing alcohol. Clean the piercing area with saline solution and ensure everything is completely dry before proceeding.
What are the best methods for safely inserting different types of nose rings, such as hoop, stud, or corkscrew rings?
For studs, insert at a slight upward angle. For hoops, gently twist open, insert through the piercing, and carefully close. For corkscrew rings, insert the straight portion first, then follow the natural curve of the spiral while turning.
How can I prevent infection after getting a nose ring or changing nose jewelry?
Maintain strict hygiene by cleaning the piercing twice daily with saline solution, avoiding touching the area with unwashed hands, and keeping facial products away from the piercing site.
What are the signs of a fully healed nose piercing that indicate it is safe to change my jewelry?
Look for absence of redness, swelling, and discharge. The area should not be tender to touch, and there should be no crusting. Complete healing typically takes 4-6 months.
What are some common mistakes to avoid when putting in a new nose ring to prevent discomfort or injury?
Avoid changing jewelry too early, using force when inserting jewelry, neglecting to sterilize new jewelry, or attempting to insert jewelry with unclean hands. Never push through resistance, as this could damage your piercing.